Technical Supplement No BKTSH001 - Caliper Overhaul |
The Rover P4 Drivers Guild make every effort to ensure thet the information and advice published is reliable and make proper reference to safety procedures. We are unable to accept responsibility for injury, damage or loss resulting from omission or error. |
Workshop Manual Reference Section H-1-14 80, 95, 100 and 110 models only |
Compiled: Barry Kensett This revision 18 January 2014 |
Overhauling Front Brake Calipers - Disc
Brake Cars
The workshop manual is a little vague with respect to details of
overhauling front brake calipers and the following notes and
diagrams may help.
If there is a possibility that the pistons are seized in the
bores, consider using the hydraulic system to displace the
pistons. Remove the pads and gently pump up the brakes until the
pistons have been dislodged; they will not come right out with
the disc in place. To prevent loss of fluid there are hose clamps
available in motoring shops (e.g. Halfords) which can be used to
nip the flexible hoses. Personally I don't like that very much
and I keep a piece of wood which is cut to fit between the base
of the driver's seat and the brake pedal; if the pedal is held
down the port is closed off and minimal fluid then escapes.
Remove the hydraulic connections and the caliper in accordance
with the manual. Blank off the connections to keep dirt out, a
bolt with the right thread is adequate. To fully remove the
pistons do not try levering on the flange of the piston - on some
of them the flange is quite thin and weak and combined with the
possibility of tilting the piston and jamming it, there is a risk
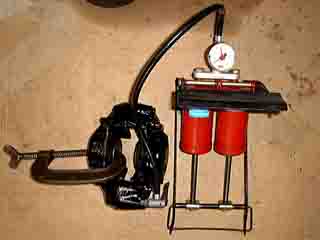
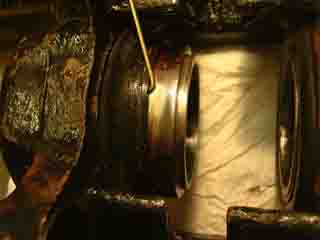
of damage to the flange. It is usually quite simple to put a foot
pump onto the bleed nipple (open it of course) and a stab on the
pump will pop the pistons out. Use a cramp if one piston is a bit
stickier than the other to control them (Figure 1).
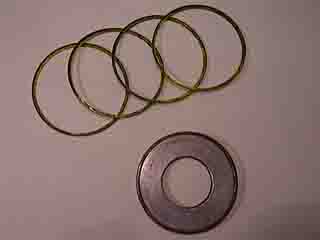
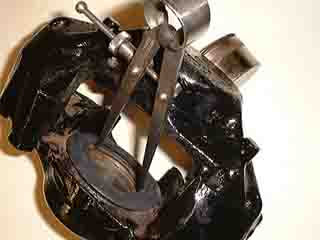
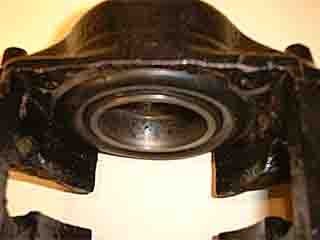
Be very careful when removing the boots to ensure
that the brass rings that hold them to the caliper bodies (Figure
2) are not damaged as they are not supplied in the rebuild kits..
It is usually best to cut the boot away and then carefully lever
the brass rings out. The brass rings on the pistons (fitted to
some cars) are less important as the new boots now have a lip
which will fit into the groove without the rings.
Even with care there is sometimes a slight bow in the brass rings
and it is worth turning a washer to make a mandrel over which it
is easy to dress back to shape. (Figure 2) The mandrel is also
used to finally push the rings in place.
Inspect the pistons for damage and corrosion. I have come across
three types of piston so far on P4's. Some are cast, have
chromium plated outer surfaces and have a fairly thick seal
retaining flange to the full diameter of the piston; these do not
have brass retaining rings on the piston. The second type are
turned and have brass retaining rings fitted to retain the boot,
the flange is a smaller diameter than the piston to let the rings
in. The third type is turned and has a shoulder rather than a
groove on the end of the piston, the pad base forms the other
side of the groove for the boot. It is essential that the outer
rim of the piston is not corroded and it must have a smooth
surface as this is the sealing face which slides against the
sealing ring. The pistons are often corroded from inside and out.
Traditional brake fluid is hygroscopic, i.e. it absorbs water and
this water collects in the brake system and causes corrosion of
steel parts. It is also possible for water to get into the
cylinders from the outside once the boots have hardened or split
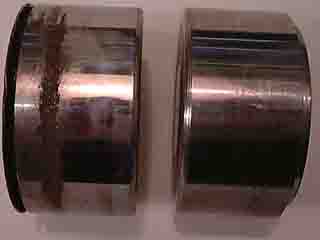
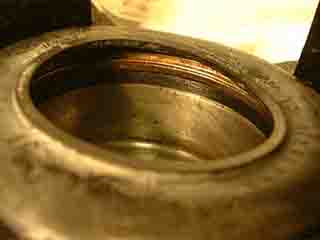
with age. In Figure 4 the corroded piston on the left is scrap.
The piston on the right (Figure 3) is not corroded and the
sealing face will polish up well. New pistons are available or
can be made by those with the knowledge and facilities. They can
be turned from bar, preferably stainless steel and the outer face
must be ground and polished to the precise size.
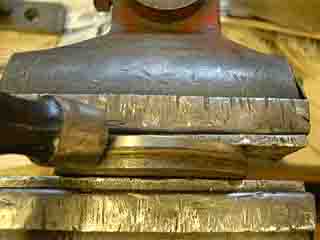
The bores of the calipers are generally in better condition than
the pistons being cast iron and less prone to attack. The surface
finish must be good as the piston slides in the bore but it need
not be polished as it is not a sealing face. Usually a light
polish with some well worn fine emery cloth will clean the bores;
if they will not clean up then it will be necessary to find a
better pair. Never try to split the caliper. Cleanliness is
essential when handling the components and mineral oil must not
be used. The bores should be flushed out with methylated spirit
and the drillings flushed through and blown out - preferably with
an airline if one is available.
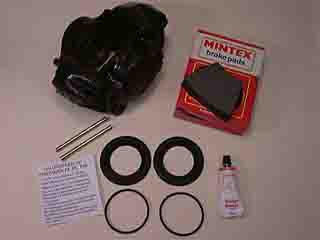
To rebuild the calipers a kit of parts as shown in Figure 5 is
required; this comprises piston seals and boots, new pads and
retaining pins and clips. The assemblies should be built up using
red rubber grease specially formulated for brake system use. This
seem to be a little difficult to find these days probably because
garages don't have the skills to rebuild cylinders these days,
they just fit new ones which is a bit more difficult for us.
Fitting the boots and pistons is a bit tricky; I remember seeing
them built up at Girling in the late fifties and they put the
bits in before they bolted the caliper halves together. We have
to work through the slot with a load of bits which would prefer
to be on the floor rather than in the cylinders. The boots should
be fitted to the calipers first, put the brass ring inside and
then tuck the boot outer rim into the groove in the caliper body.
Now the tricky bit ! The brass rings must be pushed down inside
the greased boot which is then trapped by the lip entering the
groove and stopped from coming out by the ring. The ring must not
be bent while doing this as it will just pop out again. I find it
best to hold the ring down with a pair of internal calipers (Figure
6) and then work round the ring pushing it down with a smooth
bladed small screwdriver while following up with the calipers.
Even when it looks as though it is down, hold it for a minute or
two until the rubber has relaxed into its correct position
otherwise the ring just pops out. Once it's in properly it stays
in. (Figure 7). The first one will take at least an hour and
subsequent ones ten minutes each when you've got the hang of it
so stick with it and don't be tempted to leave the rings out.
Finally slip the ring mandrel inside the boot and clamp it up to
ensure that the ring is fully bedded. (Figure 8).
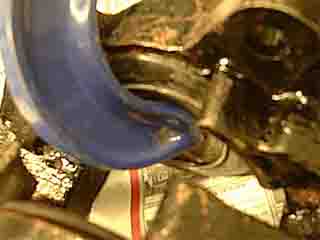
Fit the piston sealing ring into its groove, lubricate the piston
surfaces and rest it on the boot. Using a smooth ended hooky bit
of brass wire carefully stretch the boot over the piston (Figure
9) and slide the piston down ensuring that it goes in square and
does not jam. Once it enters the seal it should slide down
smoothly. Finally feed the boot into the groove around the piston
with plenty of rubber grease to help keep the water out and stand
back proudly (Figure 10)
Check that the disc face is not corroded or glazed, refit the
caliper, the pads and retaining pins as instructed in the manual.
Remove the pedal strut and fill and bleed the system. Pressurise
for ten minutes and check carefully for leaks.
©B.Kensett 2023